Introduction: Is Your WiFi Letting You Down?
Do you find yourself stuck in a corner of your house to catch a bar of WiFi? Or constantly refreshing a loading screen while streaming your favorite show? You’re not alone. In today’s hyper-connected world, patchy internet isn’t just frustrating—it’s disruptive. But here’s a question worth asking: What if a compact, affordable solution could eliminate dead zones once and for all?
Enter the Range Extender WN2000RPTv1—a practical, reliable choice for anyone tired of weak signals and dropped connections. But how do you make the most of it? How do you set it up like a pro? And how does it compare to newer models like the Range Extender WN3050RP?
Let’s break it down and walk through everything you need to know.
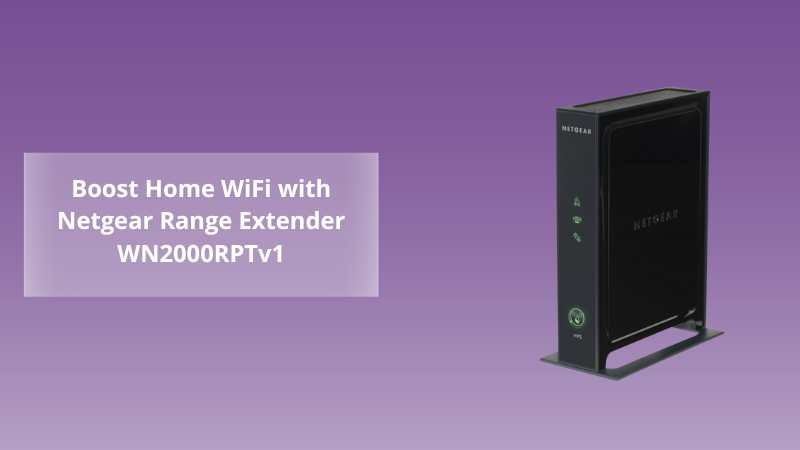
1. What is the Netgear Range Extender WN2000RPTv1?
Reliable Range Extension in a Compact Form
The WN2000RPTv1 is a wireless-N range extender designed to improve the coverage of an existing WiFi network. It works by picking up your router’s signal and rebroadcasting it to areas where coverage is weak or nonexistent. Simple in design but powerful in performance, it’s ideal for small to medium-sized homes or offices.
“A WiFi extender is like a bridge—it connects you to the place you thought you couldn’t reach.”
Key Features at a Glance
-
Wireless-N Technology: Delivers up to 300 Mbps speed.
-
Four Ethernet Ports: Connect wired devices like game consoles and smart TVs.
-
External Antennas: These are for better signal reception and broader coverage.
-
Smart LED Indicators: Help locate the best position for optimal performance.
The device is easy to install and doesn’t require a technical background. Even if you’re not tech-savvy, it’s as approachable as plugging in your toaster.
2. How to Set Up the WN2000RPTv1 Like a Pro
Step-by-Step Setup Guide
Getting your WN2000RPTv1 up and running is straightforward if you follow the steps correctly. Here’s a simple breakdown:
Step 1: Plug in your extender near your router and wait for the power LED to turn green.
Step 2: Connect your computer or mobile device to the NETGEAR_EXT WiFi network.
Step 3: Open a browser and go to http://mywifiext.net.
Step 4: The Netgear Genie setup wizard will appear. Follow the on-screen instructions to select your existing WiFi network and enter its password.
Step 5: Once connected, unplug the extender and move it to a dead zone location within range of your router’s signal.
Tip: Use the LED indicators to determine the best placement—green means good, amber is fair, and red suggests it’s too far.
Need a visual guide? Check out our related post: Mastering the Netgear Range Extender WN3050RP: Setup, Features & FAQs for insights and setup visuals.
3. Troubleshooting Common Issues
Even the most reliable devices can hit a few bumps. Here’s how to tackle them:
Issue 1: Can’t connect to mywifiext.net
-
Solution: Try using a different browser or clearing your cache. You can also use the IP address: 192.168.1.250.
Issue 2: Poor Signal Strength
-
Solution: Move the extender closer to your router. Avoid walls or large metal objects in between.
Issue 3: Extender Not Broadcasting WiFi
-
Solution: Perform a factory reset by holding the reset button for 10 seconds, then repeat the setup process.
Think of these issues like potholes in your internet highway—once you know how to fill them, your journey becomes smooth and uninterrupted.
4. Why Choose WN2000RPTv1 Over Newer Models?
While newer models like the EX8000 offer faster speeds and tri-band technology, the WN2000RPTv1 holds its ground for users who:
-
Need basic coverage extension
-
Prefer simplicity over complexity
-
Want a budget-friendly solution
-
Use standard internet tasks like browsing, email, and streaming
“The best tool is the one that fits the job—not the flashiest one in the toolbox.”
And when you’re ready to upgrade, you can always explore advanced options like the Range Extender AC EX8000: The Complete Setup Guide.
5. Expert Tips for Maximizing Performance
Getting the extender set up is just half the battle—making the most of it is where the magic happens.
Tip 1: Use Ethernet Backhaul
If possible, connect your extender to the router via Ethernet for maximum speed, especially when streaming or gaming.
Tip 2: Avoid Overlapping WiFi Channels
Log into your router’s admin panel and change channels to reduce interference.
Tip 3: Schedule a Reboot
Yes, just like your phone, your extender can benefit from a weekly reboot to keep things running smoothly.
Tip 4: Keep the Firmware Updated
Visit Netgear’s support site occasionally to check for firmware updates. This keeps your device secure and optimized.
Conclusion: Ready to Say Goodbye to Dead Zones?
So, is the Range Extender WN2000RPTv1 worth your time? If you’re looking for a dependable, no-fuss solution to end WiFi frustrations, the answer is a resounding yes.
Sure, it may not have the bells and whistles of the latest extenders, but what it offers is rock-solid reliability—and sometimes, that’s exactly what you need.
Still debating whether it’s the right fit? Start small. Get it. Test it. And if you’re looking to level up later, Netgear has a full suite of options waiting for you.
“Dead zones are dead ends. But with the right extender, your WiFi can go places you never imagined.”
Need Help With Setup?
Let us walk you through it! Visit https://www.wifi-extsetup.com for expert guidance, personalized assistance, and more setup tutorials.
Upgrade your internet experience—one room at a time.
FAQs: Quick Answers to Common Questions
Q1: Can I use WN2000RPTv1 with any router?
Yes, it’s compatible with most standard WiFi routers.
Q2: How far can the extender reach?
Typically, it covers an area of up to 1000–1500 sq. ft., depending on wall thickness and other obstructions.
Q3: Is the WN2000RPTv1 dual-band?
No, it operates on the 2.4 GHz band only.
Q4: Can I use WPS for setup?
Yes. Simply press the WPS button on both your router and extender to connect automatically.
Q5: Does this work with smart home devices?
Absolutely. You can connect smart TVs, cameras, Alexa, and more via WiFi or Ethernet ports.